[ Home] [ About the Artist ] [Available Work] [ Sewn Glass
] [ Exhibition Catalogs] [ Upcoming Shows and Workshop Schedule]
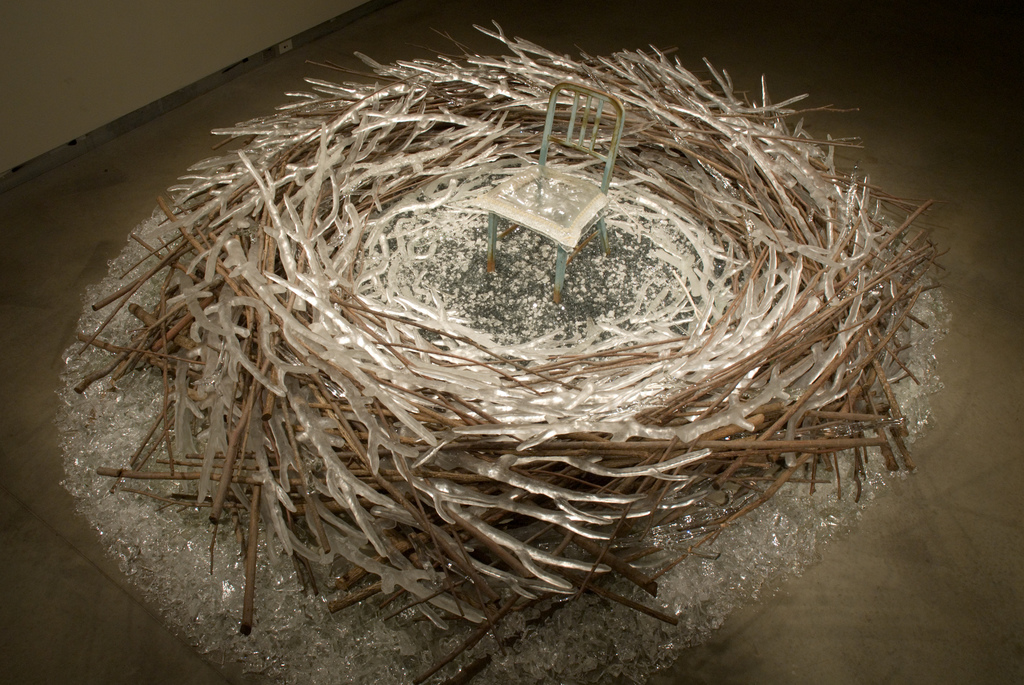
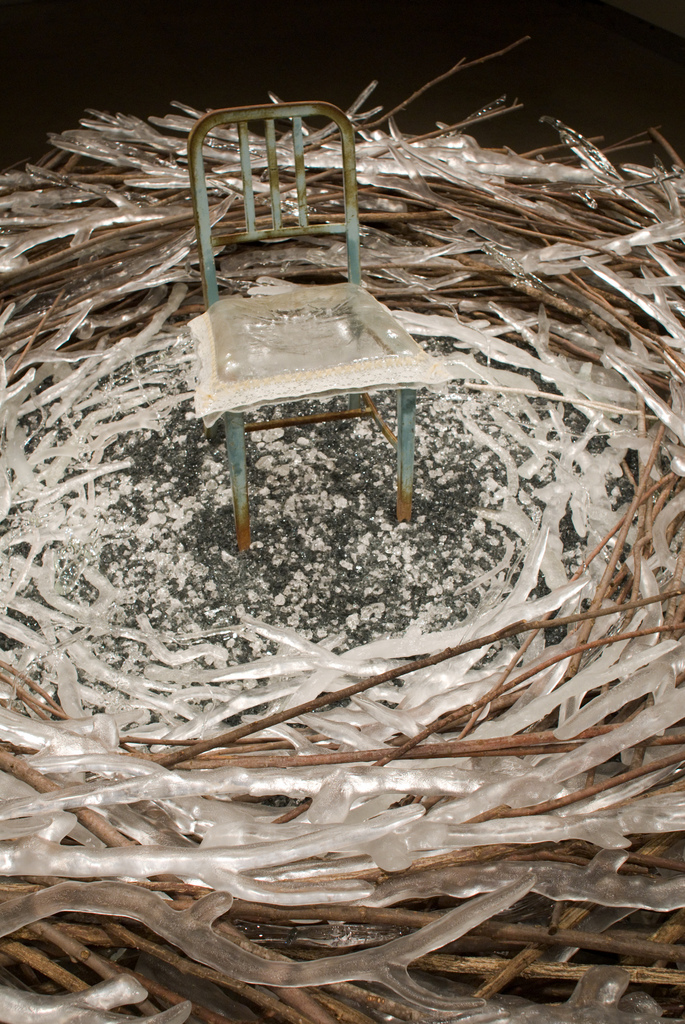
"The Communal Nest"
A residency is the playground of artists. It’s an invitation to create in a unique environment and to use state-of-the-art facilities for weeks or months. Provided with lodging and technical support, the lucky recipient of an artist’s residency is encouraged to experiment with whatever project that has been simmering on the backburner. Given this opportunity at the Pittsburgh Glass Center, I decided to embark on a project much bigger than myself and create something that not only satisfied my own creative longing, but invited the community to take part also.
The idea of “The Communal Nest” came from an existing series of my work involving the concept of the “bluebird of happiness”. In that series I combined images of bluebirds and housewives, and played homage to the feminine nesting instinct. I wanted to explore this thought further with an installation piece representing growth and shelter. I’d visited the Pittsburgh Glass Center in 2007, and knew how large the exhibition gallery was—a spacious 20’ x 70’. It seemed the perfect venue to create a large-scale assemblage exploring conceptual shelter and creative growth. In hindsight, I’ve found the creation of the Nest has also come to symbolize journey and friendship.
I felt it was important that “The Communal Nest” is built not only by myself, but also by the community surrounding it. With that in mind, I asked artists from around the world to contribute glass twigs to “The Communal Nest”. Also included are twigs sponsored by “non-artist” folks that were made by Jason Forck and many others at the Pittsburgh Glass Center. The proceeds of the sponsored twigs benefit the PGC and Bethlehem Haven Women’s Shelter of Pittsburgh. Several women from the Bethlehem Haven also attended an afternoon “twig-making” workshop where we made glass twigs to be added to “The Communal Nest”. During the months leading up to, and at the Pittsburgh Glass Center, I created 300 large glass twigs to complete the body of “The Communal Nest”. In the center of the Nest, a sewn glass pillow sits atop a chair, looking rumpled as though someone has recently been resting there. Eight additional glass sculptures accompany The Communal Nest, exploring the emotional context of home, contentment, containment, and journey.
After its debut in Pittsburgh, the installation will continue to travel, with its next scheduled venue in Columbia, Missouri in September of 2009. Contact me to learn how you can schedule a private or public installation of "The Communal Nest".
Ways
You Can Still Contribute To "The Communal Nest"
Artists can
contribute by making a twig to be added to "The Communal Nest".
See the "Continued Call To Artists" and "Glass Twig Making
101" at the bottom of this page for tips and instructions. Anyone
can contribute by sponsoring a twig to be made and added to the Nest in their
name. Contributors will be sent a signed catalog from the "Absence
of Body" exhibition in appreciation. Signed catalogs are also
available for $30 post paid.
See additional images of the exhibition "Absence of Body" at http://www.flickr.com/photos/pittsburghglasscenter/sets/72157608091882799/
Continued Call To Artists
An official
"call to artists" is extended for artists to contribute to The
Communal Nest. The project uses "crystal" clear glass twigs
(colorless) from 8"- 40" in length. The largest (40")
twigs have been made in my studio and at the PGC. I invite artist to
create and contribute twigs from 8-20" in length. The glass can be
either clear or have a frosted, translucent quality, as long as the glass is
colorless. The twigs can be made by casting, torch, off-hand. or any 'ol
method. Below is an easy kiln casting method to create a twig in "Glass
Twig Making 101". It is recommended that the points or branches not
be too delicate for obvious reasons. ARRIVAL DEADLINE IS AUGUST 15,
2009 FOR YOUR TWIG TO BE INCLUDED IN THE NEXT SCHEDULED INSTALLATION AT BINGHAM
GALLERY IN COLUMBIA, MISSOURI. All artists contributing to the Nest
will be sent a signed catalog as appreciation for their contribution.
Non artist types can also still contribute to the nest by donating $50 for a
20-30" twig, or $75 for a 30-40" twig. These twigs will be made
in my studio in your name, with the proceeds going to future installations of
The Communal Nest, where it will continue to benefit local not-for-profit
organizations. The Communal Nest can also be scheduled for installation
at your own private or public venue.
Send your twigs or contributions to:
"The Communal
Nest"
Taylor Glasgow Studios
307 N. 10th St.
Columbia, MO 65201
USA
"Glass Twig Making 101"
Bullseye sheet glass (in 1" pieces) in sand
mold
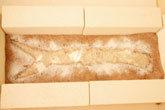
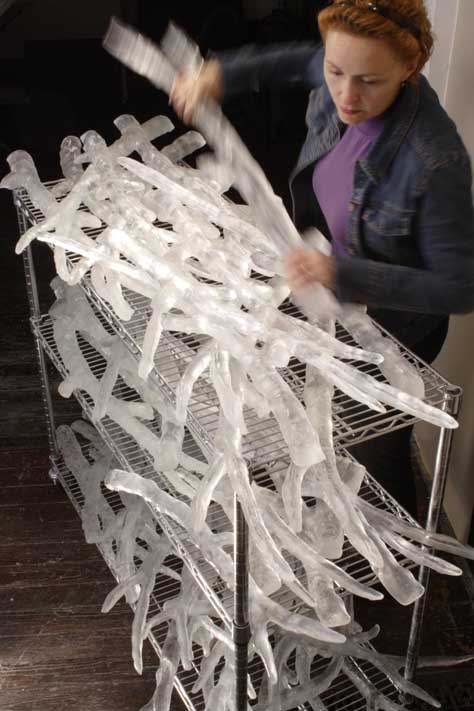
A variety of twigs on their way to the Communal Nest
Sand Casting: A few quick observations--you'll need a kiln a
couple inches bigger than the twig you want to make to allow for the
surrounding sand. I used a steel, non coated cake pan to contain the sand
and to avoid the sand sifting down between the bricks in my kiln. Also, I
was able to simply lift the pan out and use my kiln for other firings between
twigs. Please don't forget, The Communal Nest is huge. The twigs
should be at least 8" long.
Materials needed:
The biggest non coated steel cake pan you can find that will still fit in your
kiln. You can also dam a kiln shelf with kiln bricks (as seen in the
picture above) and fill and area with sand, but it takes up more space and
requires clean up if you want to use your kiln between twig firings.
Plain 'ol brown sand
Dry Potter's Plaster as a release, with sifter
Spray bottle with water
clean, clear colorless glass, broken up in 3/4-1" pieces or large frit or
cullet
Okay. Do this part on a work table outside your kiln, if you can: Fill
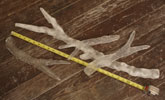
the dammed area with sand about 1-1/2- 2" deep, depending on the size twig
your casting (At least 8"). The longer the twig, the bigger it's diameter
should be for strength. I made my first twigs 16-18", 3/4 inches deep,
with a forked end, but did not allow the ends to become too fine. A
gentle curve is nice too. Using your finger, dig a twig-shaped trench in
the sand at least an inch deep, lightly spraying the sand with water and
shaping the cavity. If you're doing this inside your kiln, not spray
water on your kiln elements. Guess what, they don't like that, and
you might get electrocuted too. Dig the trench deep enough to hold enough
glass and allow for settling up to half. Keep the depth of your twig
trench somewhat uniform and remember the glass, once molten, will be self
leveling. Once you're satisfied with the shape of your twig, mist the
area lightly with water and then sift potters plaster over the twig
trench. Sift enough to cover the sand. Allow the plaster to soak up
the water, dry, and form a light crust. Now carefully fill your twig with
broken clear sheet glass or large (1/2"+) frit. The larger the glass
pieces, the more clear the twig will be and fewer bubbles will appear.
The large finished twig pictured above is a combination of sheet glass and
small frit, making it less transparent. Fill the twig carefully, so that
sand doesn't fall into the twig body. If it's obvious right away the the
sand wants to fall into the twig trench, remove the couple pieces of glass
you've put in and mist the area again with water. Put the glass in right
away even though the sand is damp, and let the sand dry during the first hour
of the firing with the kiln lid propped. Fill the twig trench with glass
even slightly over the top to allow for a lot of settling. Gently lower
the shelf or cake pan on to posts laid on their sides to allow good support and
for heat circulation and cooling. Using Bullseye sheet glass, I fire my
18", 3/4" deep twigs thusly:
200 degrees/hr to 1000 no hold
550 degrees/hr to 1250 hold 1 hr
550 degrees/hr to 1480 hold 15-45 minutes depending on your kiln and the
thickness of your twig. I soak mine for 35 minutes.
cool to 960 degrees hold 3 hours
cool 50 degrees/hr to 735 hold 1 hr
cool 50 degrees/hr to 500 hold 1 hr
off
Twigs using this method have come out crystal clear. I use minimal
grinding to remove any sharp points.
I've heard from glass artists who have done additional experimenting and had
great results using crystal clear rum bottles--1 bottle per twig to prevent
incompatibility problems. The top fusing temperature might need to be
hotter for this glass or the soak longer. I recommend watching the glass
at fusing temperature to insure it melts completely, and allowing for a longer
soak to make sure the glass touching the sand has indeed melted. The
resulting twigs are clear and colorless.
© 2009
Taylor Glasgow Studios